Tuesday, September 23, 2014

Uncle Rock's Cheesecake

This recipe is my next-door neighbor's, uncle's cheesecake recipe...a little roundabout, but so good! They had my husband and I over for dinner, served this for dessert and then shared the recipe: A dangerously simple dessert!
I love the crisp white top layer, makes a more polished look!


Filling
8oz Cream Cheese (Room temperature)
1/2 C. Sugar
1 Tbsp. Fresh Lemon Juice
1/4 Tsp. Vanilla
2 Eggs
Topping
1 C. Sour Cream
2.75 Tbsp. Sugar
1/4 Tsp. Vanilla

Graham Cracker Crust (I bought it for convenience, but homemade would be better: http://www.crazyforcrust.com/2014/06/perfect-graham-cracker-crust/)

In a stand mixer, put sugar, lemon juice, vanilla and mix. Add in 1 egg at a time. Mix and pour into your pie crust.

Bake 30 minutes (sometimes up to 45 depending on the oven) at 325 degrees... you don't want it to be too jiggly.

Topping: Once the cake looks done pull out of oven and top with the sour cream mixture, put back in the oven for 10 minutes. Take it out and set to cool. Put in the fridge... overnight is the best.

A very pretty cheesecake that tastes best with fresh berries!
Enjoy,
e

Blueberry Banana Pancakes

These are AMAZING. I seriously have no idea where my new love of pancakes has come from...but they are just such a fun weekend breakfast! The original recipe, from Food and Wine, was a little tricky in the actual cooking, but easy once you got the hang of it!

I love how the banana caramelizes!


2 C. Flour
1 Tbsp. Baking Powder
2 Tsp. Baking Soda
2 Tbsp. Sugar
1/2 Tsp. Salt 
3 Eggs
2 C. Buttermilk (easy to make- Stir 2 tablespoons of white vinegar into 2 scant cups of milk, let rest for 5-10 minutes)
4 Tbsp. Unsalted Butter, Melted
3/4 C. Blueberries
2 Bananas, Sliced Lengthwise, 2/3" thick and cut to fit the pancakes
Powdered Sugar
 
In a small bowl, whisk the flour, baking powder, baking soda, sugar and salt. In a medium bowl, beat the eggs with the buttermilk. Quickly stir in the flour mixture, then stir in the melted butter and blueberries. Heat a griddle over medium low heat and spray with nonstick cooking spray. Ladle 1/4 cup of the batter per pancake onto the griddle, leaving room for the pancakes to spread. Lay a banana slice in the center of each pancake and cook until bubbles appear on the surface, 3 to 4 minutes. Flip the pancakes and cook until golden brown on the second side, 2 to 3 minutes longer. Serve with a dusting of powdered sugar.
 
Note: The hot surface needs to be wiped down before cooking each set of pancakes because the bananas leave too much sugar on the griddle and will cause the next one to burn.
 
Such a moist and flavorful pancake and a great addition to breakfast!
Enjoy,
e

Butternut Squash Penne with Bacon and Sage

Almost like macaroni and cheese...but healthier! (cause bacon and pasta are totally healthy....)


1 Butternut Squash
1/2 Box of Penne Pasta
Salt
Pepper
5 Slices Bacon
8 Fresh Sage Leaves
1/2 C. Freshly Grated Parmesan Cheese
1/4 C. Panko Bread Crumbs
Crushed Red Pepper

Preheat oven to 375. Cut the squash in half lengthwise and place cut side down on pan. Roast for 30 minutes. Remove the squash from the oven and set aside. Cook the pasta per directions and drain. Once the squash has cooled enough to handle, scoop/cut out the insides. It doesn't matter if they are neat, but bite-sized. Place in 13x9 dish and season liberally with salt and pepper. Add the pasta and stir. Drizzle with olive oil.

Cook the bacon and then blot dry. In the hot grease, drop the sage leaves and fry. Remove and blot as well. Crumble the bacon and sage over the pasta, and stir. Top with cheese, bread crumbs, crushed red pepper and broil for 2 minutes on high.

This is a fairly light dish- the butternut squash makes it creamy, the parmesan adds tang and the bacon has the final crunch!

Enjoy,
e

Friday, August 22, 2014

Au Natural: Cloth Wipe Solution and Diaper Rash Cream

We decided to cloth diaper. Not because it's easy or saves lots of money (it does save, but not enough to make a difference in my book for one kid)...but because it's a small way of us reducing our carbon footprint. As I have gotten into it, I have seen so many more benefits! They help prevent "blow-outs," eliminate typical diaper rash and are pretty darn cute! They do however cinch tightly around chunky baby thighs and can allow for ammonia burns during nighttime use-- so I started using a "CD" safe cream for Andrew's thighs at night. With cloth diapers....come cloth wipes. Sound ridiculous? Not at all! If I am throwing my "CD" into a wet bag, it's actually easier to throw a cloth wipe in there too, instead of using a regular one and throwing it into the trash. Below are the "recipes" I use for my cloth wipe solution and my diaper cream.
 
 
Cloth Wipe Cleaner
 
4 Tbsp. Coconut Oil
4 Tbsp. Dr. Bronner's Liquid Castille Soap ( I use citrus)
8 Drops Tea Tree Essential Oil*
4 Drops Lavender Essential Oil
4 Cups Distilled Water (just boiled water that's cooled)
 
 
Mix all ingredients. You can pour over cloth wipes and store in a container or use spray bottle and dry wipes. (I use baby washcloths- I ordered 30 off of amazon and it's way more than I need with every other day diaper laundry.) This makes a quart.

Cloth Diaper-Safe Rash Cream

3 Tbsp. Beeswax (pellets are super easy and available at Whole Foods or Amazon.com)
1/2 C Organic Virgin Coconut Oil
5 drops each Lavender and Tea Tree Essential Oils*


Melt the coconut oil and beeswax using the double boiler method (You can use the microwave- but be careful of spills!!). I melted it in the container I was going to use for easy clean-up. Add the essential oils, stir and let harden. I originally did the recipe with less beeswax and it was too runny. If you find that is the case- reheat and add more!  Makes 2- 4oz. mason jars.

Creamy consistency** and smells delicious!
* Some people are weird about using Tea Tree oil on infants. I have no issue and it is a very diluted amount in both recipes. It's inherent anti-fungal properties add so much benefit to both.

** If your house is warm, the cream can melt a little due to the nature of coconut oil.

Just some natural products to add to your baby care regimen!
Enjoy, e

Tuesday, June 10, 2014

Thai Style Larb Salad

This was such a yummy, LOW CARB dinner! I always love Thai food and this is a fun twist on Larb (Minced meat salad from Laos and Thailand). It's healthy, easy and the perfect fresh dinner dish on a summer day. Adapted from this recipe.


Salty Peanuts, creamy avocado and zesty dressing make this salad appetizing and filling.

Salad
1 lb. Ground Turkey
1/4 Red Onion, Finely Chopped
5 Garlic Cloves, Minced
Salt
Pepper
Red Chili Flakes
2 Tbsp. Coconut Oil
1/3 C. Fresh Mint, Chopped
1/3 C. Fresh Cilantro, Chopped
1 Head of Romaine Lettuce, Chopped
1 Avocado, Sliced
1/2 Cucumber, Chopped
1/2 C. Peanuts, Chopped

Dressing
2 Limes, Juiced
3 Tbsp. Fish Sauce
1 Tbsp. Agave Nectar
2 Tbsp. Sriracha

In a small bowl, combine ingredients for dressing and set aside. In a bowl, combine the turkey, onions and garlic. Heat coconut oil and add the turkey mixture. Season with salt, pepper and chili flakes. Sauté until thoroughly cooked, about 7 minutes. Remove from heat and add half of the dressing and stir. Once the meat has cooled a bit, stir in the mint and cilantro. Serve on a bed of lettuce with avocado and cucumber, sprinkled with peanuts and more dressing as desired.
Serves 4.

This meal took about 25 minutes to make...from chopping to serving, that's a quick turnaround! Such a light meal, you don't feel guilty for having seconds on dessert later(which I totally did).

Enjoy,
e

Monday, June 2, 2014

Cinnamon Roll Pancakes

I am not a waffle or pancake person...it's just not my thing. I would choose breakfast burritos or bacon and eggs over syrup covered flapjacks any day; but, when I saw this recipe I was impressed.
#1 It looks SO fun. 
#2 I love cinnamon rolls. 
And those 2 reasons were good enough for me! That and my husband never gets pancakes, so I thought it would be a nice surprise.

My icing was a little lumpy....make sure your cream cheese is room temp!

CINNAMON FILLING:
4 tablespoons (1/2 stick) unsalted butter, just melted
1/4 cup + 2 tablespoons packed light brown sugar
1/2 tablespoon ground cinnamon

CREAM CHEESE GLAZE:
4 tablespoons (1/2 stick) unsalted butter
2-ounces cream cheese, at room temperature
3/4 cup powdered sugar
1/2 teaspoon vanilla extract

PANCAKES:
1 cup all-purpose flour
2 teaspoons baking powder
1/2 teaspoon salt
1 cup milk
1 large egg, lightly beaten
1 tablespoon vegetable oil
(OR just use Bisquick....)

Make the cinnamon filling: In a medium bowl, stir together the butter, brown sugar and cinnamon. Scoop into a ziploc bag and set aside.

Prepare the glaze: In a small pan, heat the butter over low heat until melted. Turn off the heat and whisk in the cream cheese until it is almost smooth. Sift the powdered sugar into the pan, stir and add in vanilla extract. Set the pan aside while you make the pancakes.

Prepare the pancake batter: In a medium bowl, whisk together the flour, baking powder and salt. Whisk in the milk, egg and oil, just until the batter is moistened (a few small lumps are fine).

Cook the pancakes: Heat a large, nonstick skillet over medium-heat and spray with nonstick spray. Use an ice cream scoop (or 1/3 cup measuring cup) to add the batter to the pan. Use the bottom of the scoop or cup to spread the batter into a circle (about 4-inches in diameter). Reduce the heat to medium low. Snip the corner of your baggie of cinnamon filling and squeeze the filling into the open corner. When your pancake begins to form bubbles, add the filling. Starting at the center of the pancake, squeeze the filling on top of the pancake batter in a swirl (just as you see in a regular cinnamon roll). DO NOT let the filling go to the edge. IT WILL BURN.


Cook the pancake 2 to 3 minutes, or until the bubbles begin popping on top of the pancake and it's golden brown on the bottom. Slide a wide spatula underneath the pancake and quickly flip it over. Cook an additional 2 to 3 minutes, until the other side is golden as well. When you flip the pancake onto a plate, you will see that the cinnamon filling has created a crater-swirl of cinnamon.


Wipe the pan with a paper towel after cooking each set of pancakes because the filling will get a thick layer  on pan and start to get smoky and burn consecutive pancakes. Repeat with the remaining pancake batter and cinnamon filling. Serve pancakes topped with a drizzle of glaze.

These were super fun and delicious! Definitely a fun addition to the weekend breakfast repertoire.

Enjoy,
e

Monday, April 21, 2014

Oat-Coco-Peanut-Choc Chip Cookies (aka Lactation Cookies)

Don't get freaked out about these being "Lactation Cookies." They are honestly just really deliciously healthy cookies...they just happen to help with a nursing mother's milk supply. Courtesy of the Brewer's Yeast in the recipe, which also has numerous other benefits including: being a source of B vitamins, protein and lowering blood sugar. The original recipe is here, but I modified it for my taste :)

Note: The brewers yeast is the magic ingredient…make sure you do not use the bread yeast. You can find it at GNC, Whole Foods or health stores in the protein powder aisle.

Brewer's yeast is typically really bitter...
but with all the yummy ingredients,
you can't taste it at all!


2-1/4 C. Whole Wheat Flour
2-1/2 C. Oats
1.5 Tsp. Baking Soda
1.5 Tsp. Salt
1-1/4 C. Peanut Butter
3/4 C. Butter, Softened
1.5 C. Flax
2.5 Tbsp. Brewer's Yeast
1/2 C. Water
3/4 C. Sugar
3/4 C. Brown Sugar
3 Tbsp.Vanilla
3 Eggs
3 C. Semi-Sweet Chocolate Chips
1.5 Cups Shredded Coconut
1/2 C. Walnut, chopped

Preheat oven to 350 degrees.
Combine flour, oats, baking soda, salt and set aside. Beat peanut butter, butter, sugar, brown sugar, vanilla, brewer’s yeast, flax and water until creamy. Mix in eggs. Gradually add in flour mixture. Mix in chocolate chips, nuts and coconut.
Spoon dough onto greased cookie sheet. Bake 12 minutes and let rest for 5 minutes before removing from cookie sheets.
Makes 3 dozen.
3 dozen makes enough to freeze and thaw
 throughout the first 2 months of post partum


These are delicious and full of nutrients! I am hoping to see the benefits too!
Keep you posted,
e

Saturday, April 19, 2014

My Dad's Recipe: Galumpkis (the pickled kind)

Since I am feeling particularly nostalgic today, I am going to post my dad's galumpki recipe.  The story about what they are and another recipe is actually posted here, but in honor of him- I decided that I would post his version (of course...it changed all the time, since he didn't use recipes-- and I added a couple things). BUT, it is as close as you can get!

Freshly rolled and in the pot!

3/4 lb Ground Pork, Raw
3/4 lb Ground Beef, Raw
1 C. Rice (I use brown)
2 Cups Chicken Broth
1/2 Onion, finely chopped
3 Garlic Cloves, chopped
Salt
Pepper
1 Large Jar of Pickle Juice (about 2.5- 3 Cups)
1 Green Cabbage, bottom cut off


Start cooking the rice per directions. Once done, set aside to cool.
While the rice is cooking, bring a large pot of slightly salted water to boil and add the cabbage. Cook covered for about 8 minutes or until leaves start to unravel. Remove cabbage and let cool in a colander. Reserve 1 cup of cabbage water.

In a large bowl, mix raw meat, onions and garlic. Add the rice (it doesn't need to be cool, just not hot enough to burn your hands when kneading the mixture). Season with just a touch of salt, lots of pepper and stir.

Take your first cabbage leaf , add a large spoonful of the meat mixture and fold the large part of the leaf over, tuck in the side and place fold side down in a large pot (like a burrito!). Continue until the mixture is done.

Pour the chicken broth and pickle juice over the rolls. Taste the broth- if too briny, dilute with reserved cabbage water (I never need to). Bring to a boil, reduce heat to medium-low and cover and simmer for like 2 hours.

He always made two versions....one with tomatoes, but everyone always liked the pickle one better.
Me and my dad, circa '85
Missing you today, Dad.
-e

Tuesday, March 4, 2014

Sweet-n-Spicy Glazed Meatloaf and Roasted Butternut Squash

When life gives you an extra pound of ground beef, make a meatloaf. I made two! This is a yummy recipe that is slightly time consuming but makes plenty of leftovers. I served with roasted butternut squash...a great complement to the meatloaf.

Hmm...juicy meatloaf and crispy squash!

Meatloaf
1.5 lbs. Ground Beef
1 Egg
1/4 Onion, chopped finely
1/4 Red Pepper, chopped finely
3 Cloves of Garlic, chopped finely
1 Tbsp. Chili Powder
1 Tsp. Cayenne Pepper
1 Tsp. Sea Salt
1 Tsp. Pepper
1 C. Panko Crumbs
Olive Oil

Glaze
1/2 C. Ketchup
1 Tsp. Cumin
2 Tbsp. Worcester Sauce
1 Tbsp. Brown Sugar
2 Tbsp. Hot Sauce (Used Chipotle flavored)

Butternut Squash
1 Butternut Squash, cut up into pieces
Olive Oil
1 Tbsp. Smoked Paprika
1 Tbsp. Cayenne Pepper
1 Tbsp. Brown Sugar
Sea Salt
Ground Pepper


Preheat oven to 350. In a large bowl, mix the meat, egg, onion, red pepper and garlic. In a small bowl, mix the panko and the spices. Add to the meat mixture and using your hands, combine thoroughly. On a large cookie sheet, layout parchment paper. Divide the meat mixture and form into two loaves. Heat a small amount of olive oil in a large skillet. Sear the meatloaf on all sides- about 2 minutes on each side. Place back on baking sheet and put in oven.

On another baking sheet, coat the butternut squash in a little olive oil and toss with all the spices, seasoning with salt and pepper. Place in oven, on rack under the meatloaf.

In a small bowl, mix the ingredients for the glaze.

After the meatloaf has been cooking for 20 minutes, remove from oven and pour the glaze over each of the loaves. Turn the squash over. Return both to oven. Continue to cook for 30 minutes.

This was a sweet and spicy dish that was both comforting and delicious. It definitely had a nice amount of heat and flavor!

Enjoy,
e

Monday, March 3, 2014

Creamy Spinach, Artichoke and Chicken Pasta

This was basically spinach artichoke dip that is allowed for dinner since there was chicken and pasta involved. Definitely a delicious dish and I don't even want to think about the calories...BUT whatever, I am pregnant-- so I need to get those extra calories in :)
The picture is pretty pathetic because we dug into it before I could get a pic!

I was eating when I took the pic...thus the fork.


3 Large Chicken Breasts, cut into bite-sized pieces
1 Tbsp. Italian Seasoning
1 Tsp. Sea Salt
1 Tsp. Pepper
1 Tbsp. Garlic Powder
3 Tbsp. Butter, divided
1 8.5oz Can Artichokes, drained and chopped
3 Garlic Cloves, chopped
1 Bag Baby Spinach
1 Box Penne Pasta
1/4 C. Grated Parmesan Cheese
1/4 C. Mayonnaise
1/3 C. Cream Cheese
Crushed Red Pepper
Sea Salt and Pepper to taste
1/2 C. Shredded Mozzarella Cheese

Preheat oven to 400 degrees. Bring water to a boil and add pasta. Toss the chicken with the Italian seasoning, salt, pepper and garlic powder. In a large pan, heat 2 tbsp. butter and throw the chicken into the pan and sauté until cooked. Remove chicken but leave butter and drippings. Add the artichokes and garlic, sauté for about 2 minutes and then add the spinach and cook until wilted.

At this point the pasta should be done (cook for 10 minutes). Drain and put back in large pot. Add 1  tablespoon butter and stir. Add the mayo, cream cheese, parmesan and stir until all melted and covering the pasta. Add in the spinach/artichoke mixture and the chicken. Season with salt, pepper and a little crushed pepper. Transfer into a casserole dish and cover with the mozzarella. Cover with tin foil and bake for 20 minutes. Remove the foil and cook for 5 more minutes, when the cheese is melted and bubbly.

Dangerously delicious!
Enjoy,
e

Thursday, February 20, 2014

Homestyle Fried Onions and Horseradish Dipping Sauce

After eating these amazing fried onions in Charleston, SC, I couldn't stop thinking about them! When we decided to have steaks for Valentine's Day, I thought..."well this could be DELICIOUS!" So, I looked up a few recipes and modified this one by the Pioneer Woman, to make it work!


1 C. Milk
1 Tbsp. White Vinegar
1 Egg
1 C. Flour
1/2 Tsp. Cayenne
1 Tsp. Salt
1/2 Tsp. Pepper
1 Onion, Sliced Thinly
Vegetable Oil

First, make buttermilk. Add the milk to the vinegar and set aside for 5 minutes. Whisk in an egg. Add the onion slices and massage in milk/egg mixture. Let the onions soak for about 30 minutes, turning them to make sure they are covered.

In a separate bowl, mix flour, cayenne, salt, and pepper. Add onions to the mixture and shake off the excess.

In a deep pot or skillet, heat oil to 360. Drop in onions and fry for about 2 minutes. Remove and place on paper towels. The first few batches will be light in color, but once the oil gets "dirty," the onions will get darker.

My handsome assistant

These were SO delicious! We piled them on our steaks and served with this horseradish sauce.

Horseradish Sauce

1/4 C. Sour Cream
1 Tbsp. Mayonnaise
1 Tsp. Dijon Mustard
3 Tbsp. Horseradish
A Couple Grinds of Pepper

Mix it all together and enjoy!!

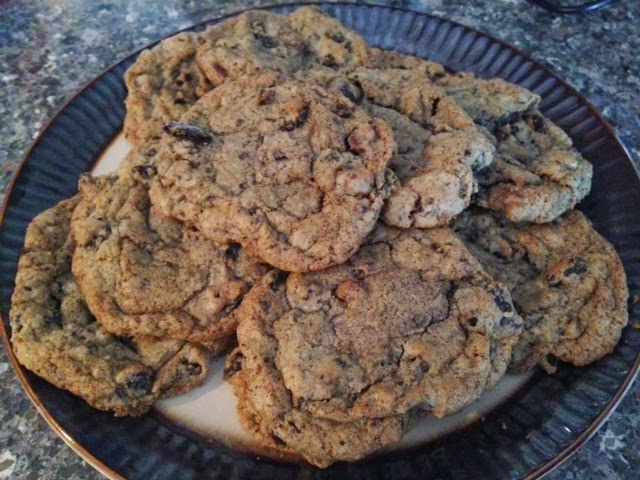
Chocolate Chip Oreo Cookies

When I worked at design firm, one of the catering companies always brought crushed oreo chip cookies... I decided to find a recipe and try it out! Well these were BETTER!


1 Stick Softened Butter
6 Tbsp. Sugar
6 Tbsp. Brown Sugar
1 Egg
1/2 Tsp. Vanilla
1-1/4 C. Flour
1/2 Tsp. Baking Soda
1/2 Tsp. Sea Salt
8 Oreo Cookies broken into pieces
1 C. Chocolate Chips
Preheat oven to 350 degrees. Cream butter and sugars in stand mixer until well combined. Beat in egg and vanilla.
Combine flour, baking soda and salt into a large bowl and stir. Slowly add to mixer. Stir in oreos and chocolate chips until just combined.
 
Spoon dough onto a baking sheet. Bake for 10 minutes or until cooked, but still soft. Let cool on baking sheet for 3 minutes before transferring to cooling rack.
 
Such a delicious cookie- crispy edges with a gooey soft center!


Tuesday, January 28, 2014

Leftover Pulled Pork- Part I Red Pork Curry

My husband loves smoking meat--- he will put an 8 lb. pork butt on the smoker and expect us to eat it for 2 weeks! Man, the same meat gets old! You can only eat pulled pork with bbq sauce for so many days (unless you are my husband and he could eat it every day...forever). So, I get creative. I know not everyone has an excess of smoked meats lying around-- but the idea is innovating with what you have!!!

By no means authentic Thai- but a yummy weeknight meal!


Olive Oil
1 Onion, chopped
1 Can Coconut Milk
3 Tbsp. Red Curry Paste (I used Thai Kitchen)
1 Tbsp. Brown Sugar
1 C. Assorted Veggies (I used frozen peas)
2 Tbsp. Fish Sauce
1/4 C. Chopped Cilantro
Sriracha

In a large pan, heat olive oil and sauté the onions for a few minutes. Add coconut milk and bring to a simmer over medium heat. Stir in curry paste and sugar until well blended; bring to boil. Reduce heat to low; simmer 5 minutes. Stir in pork. Cook 3 to 5 minutes until the meat is heated and add fish sauce. Stir in cilantro and season with salt and pepper. I served over egg noodles, but would be great over rice. I of course added a couple dashes sriracha, cause who doesn't like a little spice?

Simple, tasty- and quick! You can make this recipe with chicken breasts--- just sauté with the onion first!

Enjoy,
e

Sunday, January 12, 2014

Mexican Style Shredded Beef

This is an awesome way to make shredded beef. Once you have it-- the possibilities are endless: tacos, burritos, enchiladas, tamales, chili, and more. It's a little time consuming- but if you make enough, it's worth your while.

Just a big pot of shredded beef...

Olive Oil
1 Onion, Chopped
1.2 Lb. Beef Roast
1 Can Diced Tomatoes
1 Red Pepper, Chopped
1 Jalapeno, Chopped
2 Tbsp. Cumin
1 Tbsp. Garlic Powder
1 Tbsp. Cayenne Powder
Ground Pepper
Sea Salt

Preheat oven to 350. In a dutch oven, heat olive oil and add onions. Sauté for a few minutes. Take the roast and pat dry. Trim the fat and sprinkle all over with salt. Place in the dutch oven and sear on all sides about 30 seconds or until a light brown. Add the red pepper, jalapeno and tomatoes. Cover and place in oven for 1 hour. Remove from oven and turn the meat over. Return to oven for another hour.
Take out off oven and place on stove top. With a fork and knife, start to shred the beef. You should be able to do about half. At least get the meat broken apart and immersed in the tomato mixture. Add the spices and stir. Cover and continue to cook for another 30 minutes. Check back and continue to shred. Season with salt and pepper and use however you want!

I made burritos with guacamole, salsa and beans--It was tender and very flavorful! We have a lot leftover so I will probably make more enchiladas... they really are my favorite (and to be fair, we gave away the last batch!).

Enjoy,
e

Friday, January 10, 2014

Spicy Veggie Enchiladas

I love enchiladas...one of my favorite in the Mexican cuisine family. This recipe was for a veg-friend, so instead of chicken or beef--- I filled it with beans, corn and peppers. Spicy, filling and still satisfying!

I didn't skimp on the cheese...at all.

Olive Oil
1/2 Onion, chopped
1/2 Red Pepper, chopped
1 Jalapeno, chopped
1 Can Black Beans
1 Can Corn
1 Can Kidney Beans
1 Tsp. Garlic Powder
1 Tbsp. Chili Powder
1 Tbsp. Cumin
1 Tsp. Cayenne Powder
1/2 C. Hot Salsa
Salt
Pepper
6 Flour Tortillas
1 10oz. Can Enchilada Sauce
2 Cups Mexican Blend Cheese

Preheat oven to 350. In a large pan, heat olive oil and sauté onions, red pepper and jalapeno. Cook for about 3 minutes, until soft. Add the corn, beans, salsa and spices. Stir and season with salt and pepper.

Just add tomatoes and it could be veggie chili!

In a 13x9 pan, pour 1/3 of the enchilada sauce on the bottom. Fill each tortilla with about 1/2 cup filling. Fold the burrito and place seam down. Repeat with the rest of the tortillas. Cover with the remaining sauce. Cover and bake for 30 minutes. Remove from oven and sprinkle with cheese. Bake for another 5 minutes and cheese is melted and bubbly.

A yummy meat-free dish that hits the comfort food spot! Serve with sour cream and some freshly chopped cilantro and scallions!

Enjoy,
e

Friday, January 3, 2014

Soft and Chewy Chocolate Chip Cookies

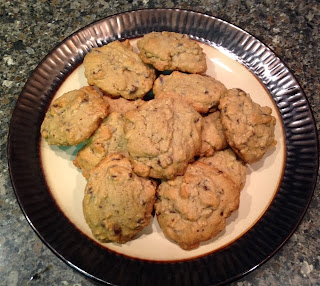
I am not a baker. It does not come naturally to me....that whole measuring and precision thing. BUT, I really wanted some cookies... so I looked online for the "best chocolate chip cookies" and this was the recipe I found.

It's cookie time.


1 C. Butter, softened
1 C. White Sugar
1 C. Brown Sugar
2 Eggs
2 Tsp. Vanilla Extract
1 Tsp. Baking Soda
2 Tsp. Hot Water
1/2 Tsp. Salt
3 C. All Purpose Flour
2 C. Semi-Sweet Chocolate Chips
1 C. Walnuts, Chopped

Preheat oven to 350. In a stand mixer, blend butter and sugars. Add one egg at a time while mixing and then vanilla. In a small cup, dissolve the baking soda in the water; then add to batter along with salt. Mix in one cup of flour at a time. Add chocolate chips and walnuts.

On an ungreased cookie sheet, drop small spoonful's of the cookie batter-- it will be stiff and sticky.  The original recipe suggests a 10 minute cook time... My sheets averages 15 minutes each. Use your judgment, be careful not to overcook!

This was definitely a delicious cookie! Soft and chewy, but a little sweeter* than I typically prefer so I suggest cutting both sugars to 3/4 C.  Oh and because I am an awesome wife.. I added 1/2 C. Peanut Butter Chips to Scooters half :)

*Follow up-- the next AM, they were perfect....I think they just tasted extra sweet out of the oven. Perhaps leave the sugar...you choose!

Enjoy,
e